
Kitchen
Three you can have on the table tonight,
one the kids can make,
and three worth a slow Sunday.
Cocina
Tres que puedes tener en la mesa hoy,
uno que pueden hacer los niños,
y tres que valen un domingo lento.
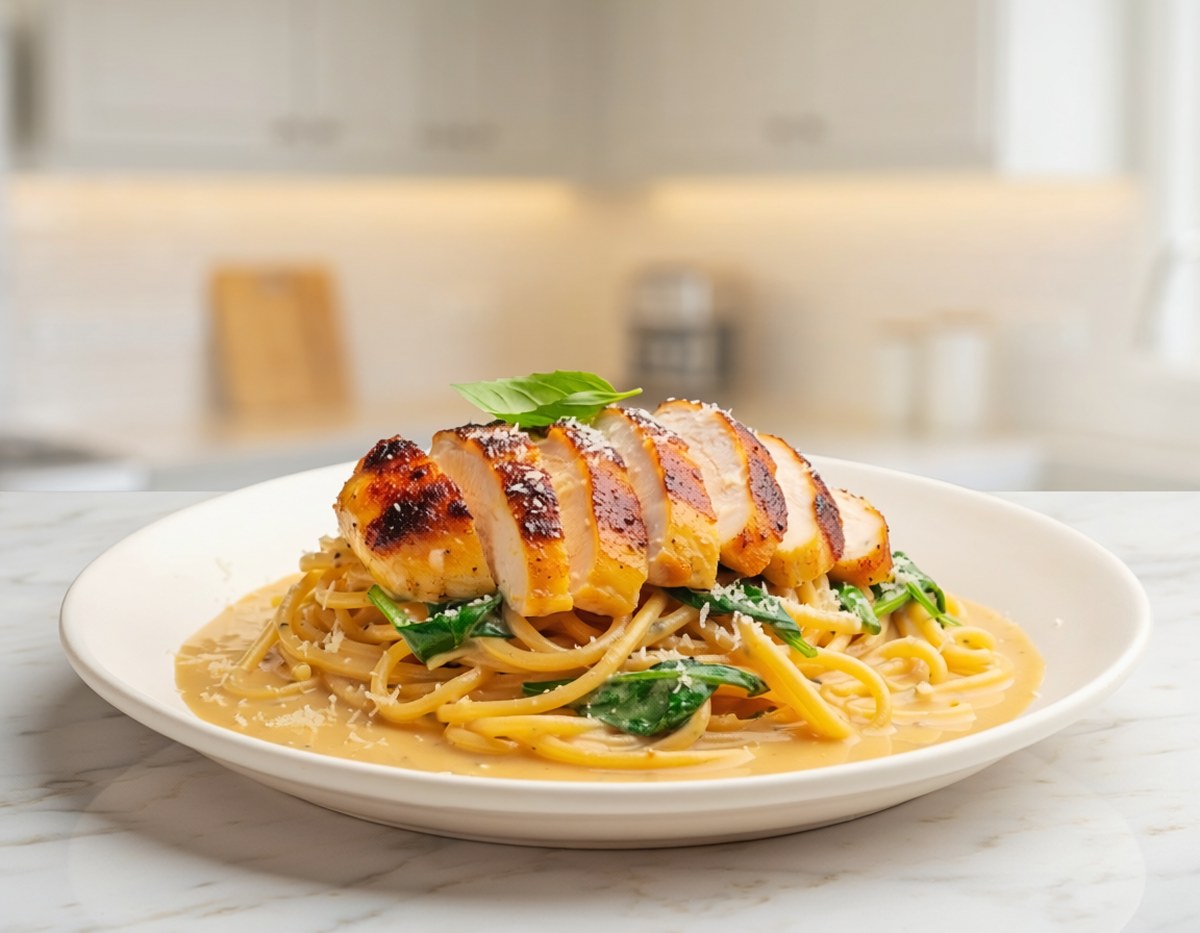
Slice the chicken thin — across the grain, about a centimeter. Thin chicken cooks in six minutes and stays juicy; a whole breast takes twenty and dries out. That one change is most of the recipe.
Salt the pasta water until it tastes like the sea and get the pasta in. While it cooks, sear the chicken in a hot pan with oil, in a single layer, and leave it alone until it releases — if you have to tug it, it is not ready. Two minutes a side. Garlic goes in for the last thirty seconds only, or it burns and turns bitter.
Before you drain, save a mugful of the pasta water. That is the whole trick. Tip the drained pasta into the chicken pan with a good splash of that water and the parmesan, and stir hard. The starch and the cheese emulsify into a glossy sauce that clings — no cream needed. Spinach at the end; it wilts in seconds.
If it looks dry, add more pasta water, not oil. Oil makes it greasy; starchy water makes it a sauce. A splash at a time until it coats the back of a spoon.
The kid job: grating the parmesan and tearing the spinach. Both genuinely useful, neither can be done wrong.
Corta el pollo delgado — contra la fibra, como un centímetro. Así se cocina en seis minutos y queda jugoso; una pechuga entera tarda veinte y se seca. Ese solo cambio es casi toda la receta.
Sala el agua de la pasta hasta que sepa a mar y ponla a cocer. Mientras, sella el pollo en una sartén caliente con aceite, en una sola capa, y no lo muevas hasta que se despegue solo — si tienes que jalarlo, no está listo. Dos minutos por lado. El ajo va solo en los últimos treinta segundos, o se quema y amarga.
Antes de escurrir, guarda una taza del agua de la pasta. Ese es todo el truco. Echa la pasta escurrida en la sartén del pollo con un buen chorro de esa agua y el parmesano, y revuelve fuerte. El almidón y el queso se emulsionan en una salsa brillante que se adhiere — sin crema. La espinaca al final; se marchita en segundos.
Si se ve seca, agrega más agua de la pasta, no aceite. El aceite la vuelve grasosa; el agua con almidón la vuelve salsa. Poco a poco, hasta que cubra el dorso de una cuchara.
La tarea del niño: rallar el parmesano y romper la espinaca. Las dos sirven de verdad y ninguna se puede hacer mal.
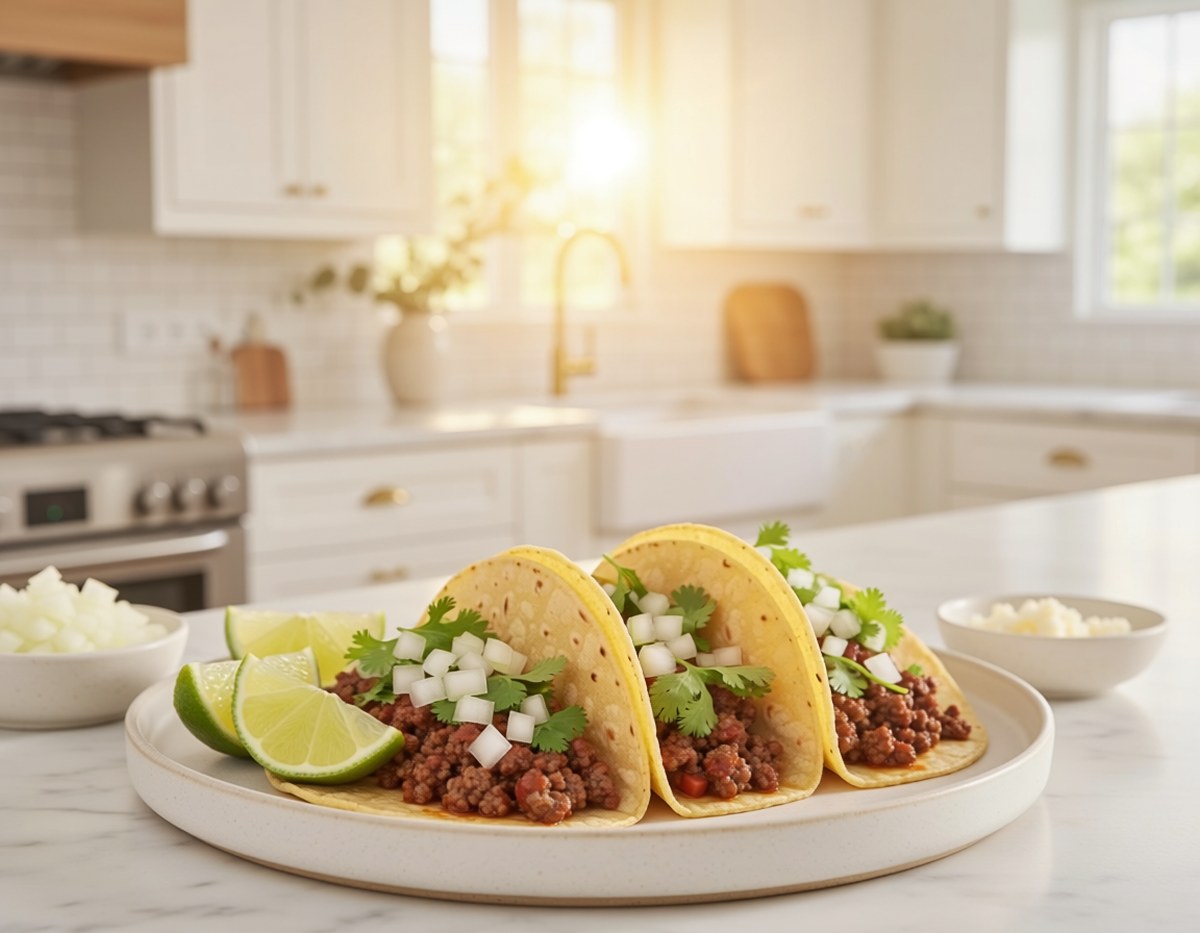
Get the pan properly hot, add the meat, spread it out and leave it three or four minutes without stirring. Almost everyone stirs straight away, and that is exactly why home tacos taste flat — the meat steams in its own liquid instead of browning. Browning is the flavor. Let one side form a real crust, then break it up.
Push the meat aside, soften the onion in the fat, add the garlic, then put the spices and tomato paste straight into the hot fat for a minute before any liquid. Dry spices need fat and heat to wake up; tipped into liquid they taste dusty.
Add a splash of water, scrape the brown bits off the bottom, and let it bubble down about five minutes until it is saucy rather than wet.
Warm the tortillas directly on the flame, or in a dry pan until they blister and smell toasted — thirty seconds a side. This is the difference between a taco and a sandwich, and it costs nothing.
The kid job, and the real point: every topping in its own bowl, and they build their own. A child who assembled it eats it. A plate handed over finished is a plate to be negotiated with.
Calienta bien la sartén, agrega la carne, extiéndela y déjala tres o cuatro minutos sin moverla. Casi todos la revuelven de inmediato, y por eso los tacos de casa saben planos — la carne se cuece al vapor en su propio jugo en vez de dorarse. Dorar es el sabor. Deja que un lado forme costra de verdad y luego desménuzala.
Haz la carne a un lado, acitrona la cebolla en la grasa, agrega el ajo, y luego echa las especias y la pasta de tomate directo en la grasa caliente un minuto antes de agregar líquido. Las especias secas necesitan grasa y calor para despertar; echadas al líquido saben a polvo.
Agrega un chorro de agua, raspa lo dorado del fondo y deja reducir unos cinco minutos, hasta que quede jugosa y no aguada.
Calienta las tortillas directo en la llama, o en un comal seco hasta que se ampollen y huelan a tostado — treinta segundos por lado. Esa es la diferencia entre un taco y un sándwich, y no cuesta nada.
La tarea del niño, y el punto de verdad: cada ingrediente en su propio tazón, y que armen el suyo. Un niño que lo armó se lo come. Un plato que le llega hecho es un plato que hay que negociar.
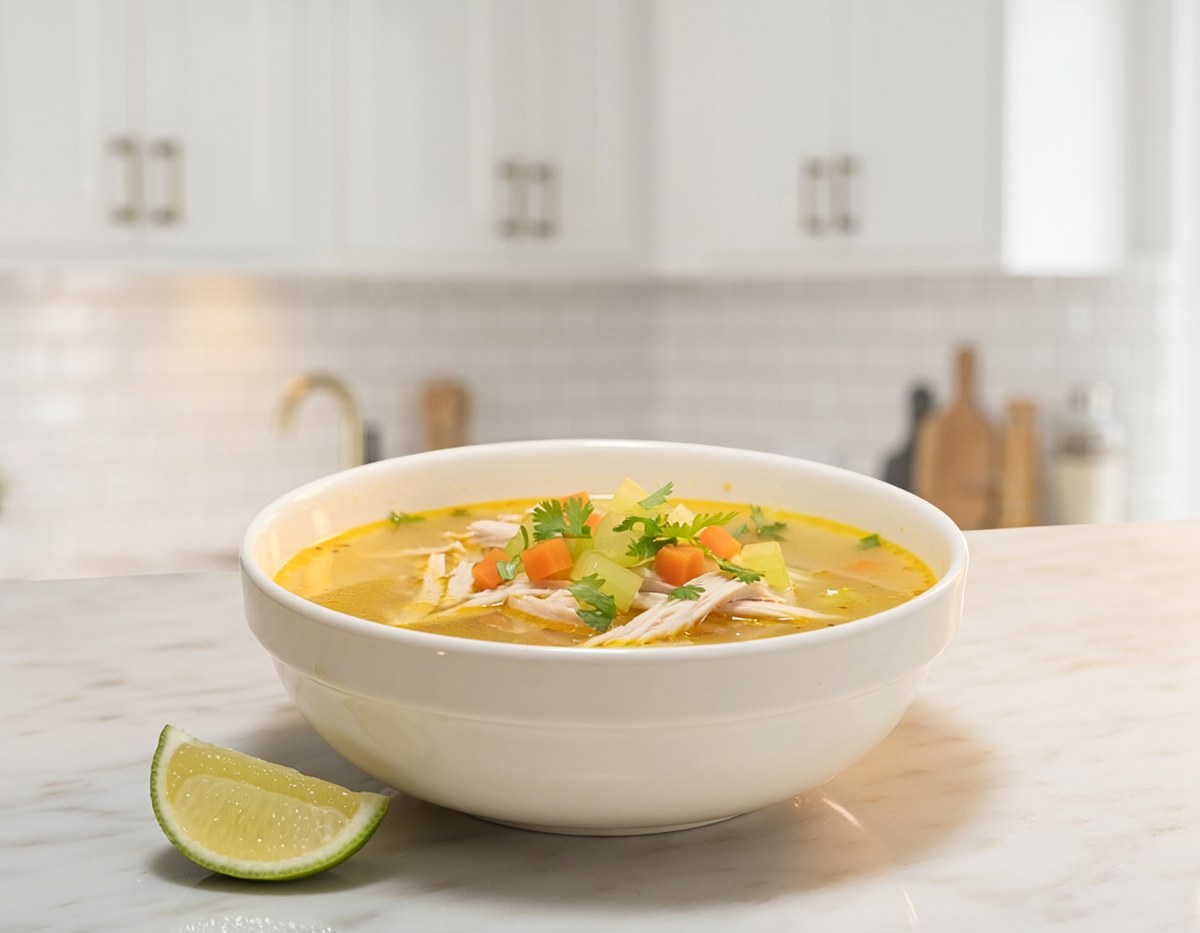
Chop the onion, carrot and celery small and cook them in a little oil for five or six minutes — long enough to take some color, not just to go soft. That browning is the difference between a soup that tastes of something and one that tastes of hot water. Garlic in for the last thirty seconds.
Add the stock, the bay leaf, the cumin, and the chicken thighs raw and whole. Simmer gently for about fifteen minutes, until they are cooked through.
Lift the chicken out, shred it with two forks, and put it back. That is it.
If it tastes flat, it is not salt — it is acid. Squeeze in half a lime at the end, off the heat, and taste again. This is the single most useful thing to know about soup, and almost nobody is told it. Salt makes a flat soup salty; acid makes it taste finished.
Poach the chicken in the soup, not beside it. Cooking it separately and adding it at the end gives you chicken in broth. Cooking it in the broth gives you chicken soup — everything the meat gives off stays in the pot.
Herbs at the end, always. Cilantro thrown in early turns gray and tastes of nothing. Torn over the top at the last second, it does the whole job.
Serve it over rice, or with noodles, or with sliced avocado on top. It reheats better the next day than almost anything else you will cook this week.
The kid job: squeezing the lime and tearing the cilantro — the two steps that finish it. Let them taste it before and after the lime goes in. They will notice, and they will remember it far longer than being told.
Pica la cebolla, la zanahoria y el apio pequeños y cocínalos en un poco de aceite cinco o seis minutos — lo suficiente para que tomen color, no solo para ablandarse. Ese dorado es la diferencia entre una sopa que sabe a algo y una que sabe a agua caliente. El ajo en los últimos treinta segundos.
Agrega el caldo, el laurel, el comino y los muslos de pollo crudos y enteros. Deja a fuego suave unos quince minutos, hasta que estén cocidos.
Saca el pollo, desménuzalo con dos tenedores y devuélvelo a la olla. Ya está.
Si sabe plana, no le falta sal — le falta acidez. Exprime medio limón al final, fuera del fuego, y prueba otra vez. Es lo más útil que se puede saber sobre las sopas, y casi nadie te lo dice. La sal vuelve salada una sopa plana; el ácido la vuelve terminada.
Cocina el pollo dentro de la sopa, no al lado. Cocerlo aparte y echarlo al final te da pollo en caldo. Cocerlo en el caldo te da sopa de pollo — todo lo que suelta la carne se queda en la olla.
Las hierbas al final, siempre. El cilantro echado al principio se pone gris y no sabe a nada. Roto por encima en el último segundo, hace todo el trabajo.
Sírvela sobre arroz, o con fideos, o con aguacate en rodajas encima. Recalentada al día siguiente queda mejor que casi cualquier otra cosa que cocines esta semana.
La tarea del niño: exprimir el limón y romper el cilantro — los dos pasos que la terminan. Deja que la pruebe antes y después del limón. Va a notar la diferencia, y se le va a quedar mucho más que si se lo explicas.
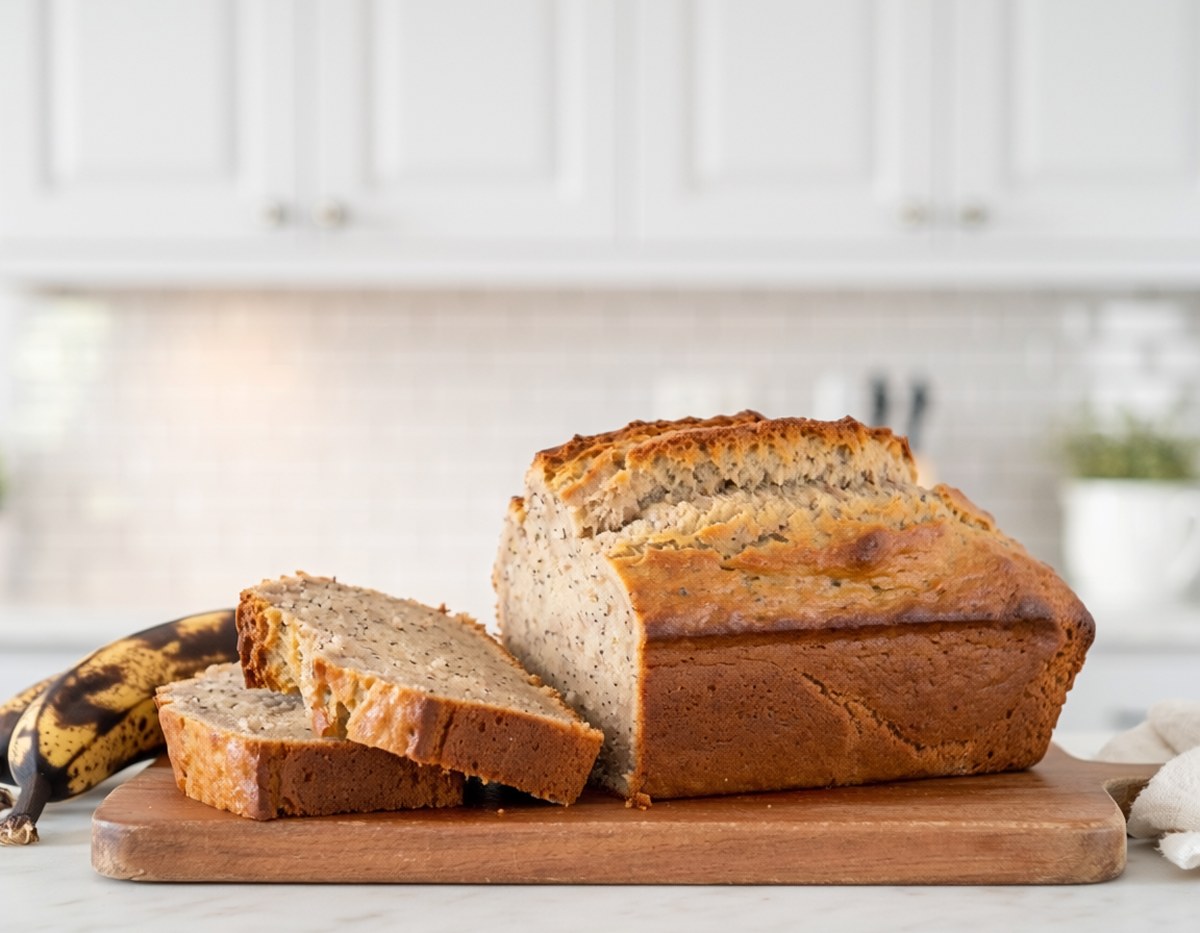
Mash the bananas in a big bowl with a fork — leave it lumpy. Stir in the melted butter, then the sugar, egg and vanilla. Add the baking soda and salt. Tip in the flour and stir only until you can no longer see dry flour, then stop.
Into a lined loaf pan, and bake at 175°C / 350°F for 50–60 minutes, until a skewer comes out clean. Cool in the tin for ten minutes before turning it out.
The bananas decide everything. Spotty yellow is not ripe enough. You want them black — ugly, soft, the ones you would normally throw away. The starch has turned to sugar by then, and that is the whole flavor. A loaf made with yellow bananas tastes of cake; one made with black bananas tastes of banana.
The one thing that ruins it: overmixing. Beating the batter smooth develops the gluten and gives you a rubbery, tight loaf. Lumps are correct. Undermixed is better than overmixed.
Every time one goes too far, peel it and put it in a freezer bag. When you have three, you have banana bread — no planning required. Frozen and thawed bananas are even better; they collapse into mush and are sweeter than fresh ones.
The kid job: mashing the bananas. It is loud, it is impossible to get wrong, and it is genuinely the step that matters — which is rarer in kitchen jobs for children than you would think.
Machaca los bananos en un bol grande con un tenedor — déjalos con grumos. Agrega la mantequilla derretida, luego el azúcar, el huevo y la vainilla. Añade el bicarbonato y la sal. Echa la harina y revuelve solo hasta que ya no veas harina seca, y para.
A un molde forrado, y hornea a 175 °C durante 50 a 60 minutos, hasta que salga limpio un palillo. Deja enfriar diez minutos en el molde antes de desmoldar.
Los bananos lo deciden todo. Amarillo con pintitas no está suficientemente maduro. Los quieres negros — feos, blandos, esos que normalmente botarías. Para entonces el almidón ya se convirtió en azúcar, y ahí está todo el sabor. Uno hecho con bananos amarillos sabe a bizcocho; uno hecho con bananos negros sabe a banano.
Lo único que lo arruina: batir de más. Dejar la mezcla lisa desarrolla el gluten y te da un pan gomoso y apretado. Los grumos son correctos. Mejor pasarse de poco que de mucho.
Cada vez que uno se pase, pélalo y mételo en una bolsa de congelador. Cuando tengas tres, tienes pan de banano — sin planear nada. Congelados y descongelados quedan aún mejor: se deshacen solos y son más dulces que los frescos.
La tarea del niño: machacar los bananos. Es ruidoso, es imposible hacerlo mal, y es de verdad el paso que importa — algo más raro de lo que parece en las tareas de cocina para niños.
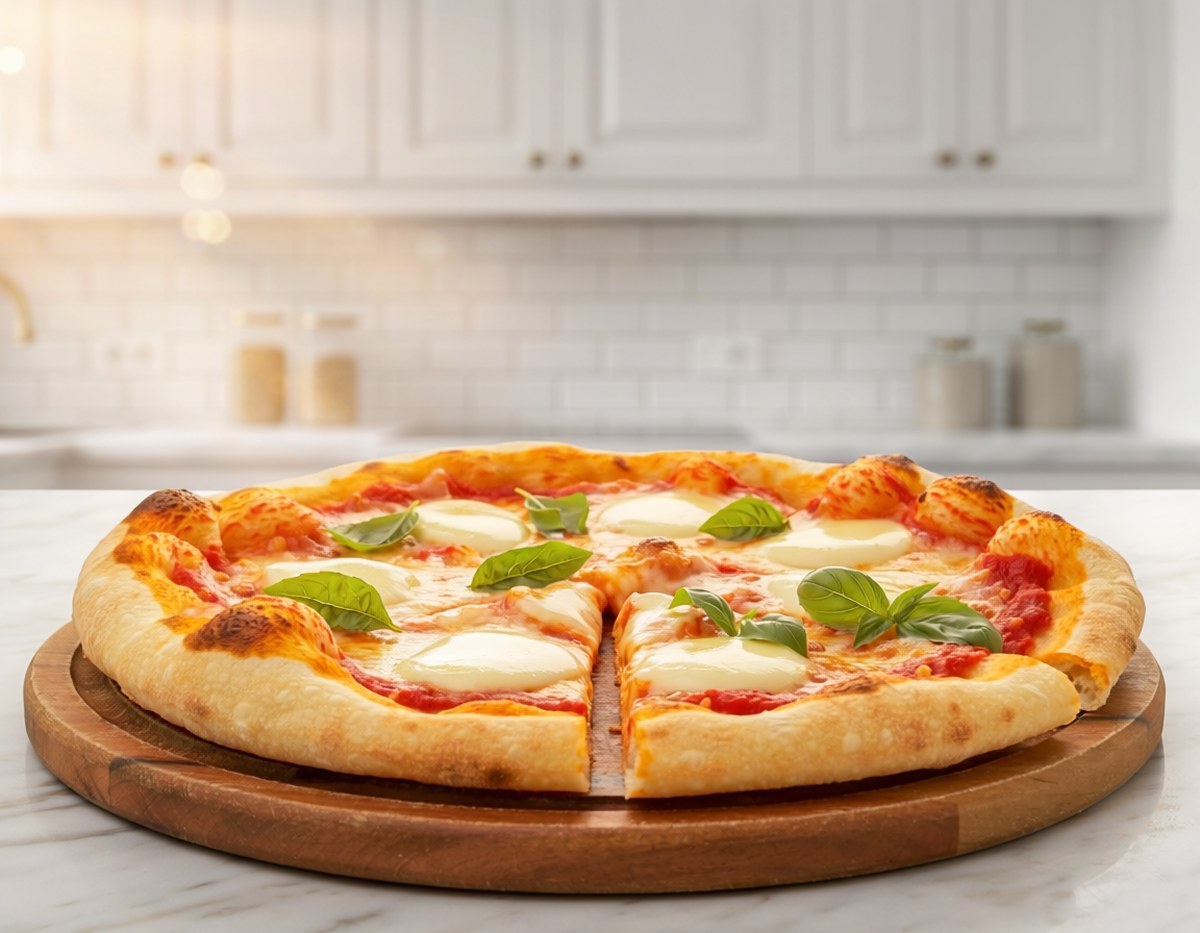
Mix everything in a bowl until there are no dry patches. It will look shaggy and wrong. Leave it ten minutes, then fold it over itself four or five times in the bowl — that is all the kneading it needs.
Cover it and put it in the fridge overnight, or up to three days. The long cold rise is doing the work you would otherwise do with your hands, and it is what gives the crust its flavor. A dough made in the morning and baked at dinner is fine. A dough made Sunday and baked Tuesday is better.
Take it out an hour before you want to cook. Divide in two, shape into loose balls, let them sit under a towel.
Oven as hot as it goes, with a tray or stone heating inside it for at least 30 minutes. Stretch the dough with your fingertips, never a rolling pin — a rolling pin presses out the air you spent three days making. Top it lightly. Bake 7–10 minutes until the edge is blistered.
The mistake everyone makes: too much topping. A wet, loaded pizza steams instead of baking, and the middle never crisps. Less than looks right is right.
The kid job: stretching the dough and choosing what goes on it. Give them their own ball and let the result be whatever it is — a lopsided pizza made by a six-year-old is still a pizza, and they will eat every bit of one they shaped themselves.
Mezcla todo en un bol hasta que no queden zonas secas. Se verá grumosa y fea. Déjala diez minutos y luego dóblala sobre sí misma cuatro o cinco veces dentro del bol — ese es todo el amasado que necesita.
Tápala y guárdala en la nevera toda la noche, o hasta tres días. La fermentación larga en frío hace el trabajo que harías con las manos, y es lo que le da sabor a la corteza. Una masa hecha en la mañana y horneada en la cena funciona. Una hecha el domingo y horneada el martes es mejor.
Sácala una hora antes de cocinar. Divide en dos, forma bolas sueltas y déjalas bajo un paño.
El horno lo más caliente posible, con una bandeja o piedra calentándose dentro al menos 30 minutos. Estira la masa con las yemas de los dedos, nunca con rodillo — el rodillo saca el aire que tardaste tres días en crear. Pon poco encima. Hornea de 7 a 10 minutos hasta que el borde se ampolle.
El error de siempre: demasiados ingredientes encima. Una pizza cargada y húmeda se cuece al vapor en vez de hornearse, y el centro nunca queda crujiente. Menos de lo que parece correcto es lo correcto.
La tarea del niño: estirar la masa y elegir qué le pone encima. Dale su propia bola y deja que salga como salga — una pizza chueca hecha por alguien de seis años sigue siendo una pizza, y se come entera la que armó ella misma.
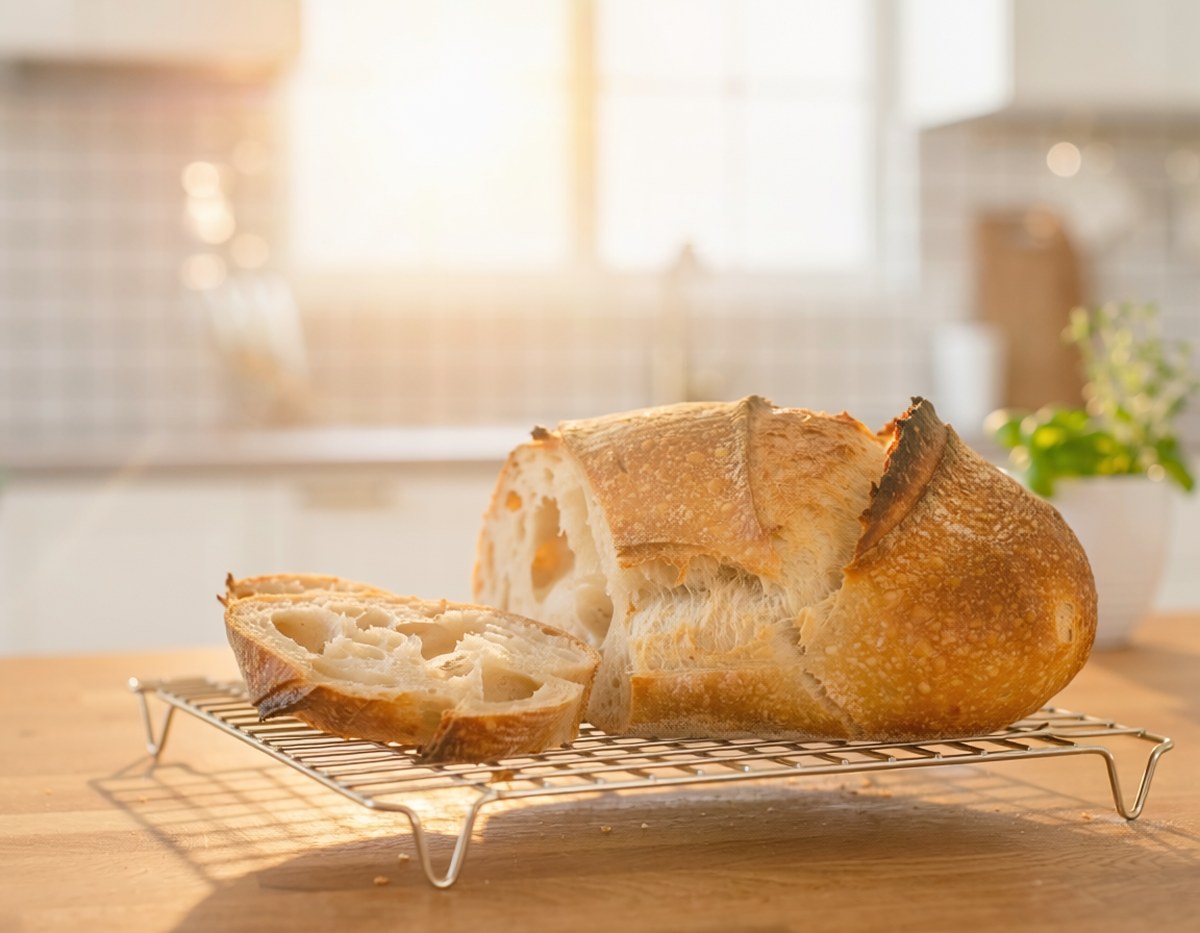
Stir the four things together with a spoon until combined. Cover the bowl. Leave it on the counter 12 to 18 hours. That is the entire method — time replaces kneading completely.
Tip it onto a floured counter, fold the edges into the middle to make a rough ball, and let it rest 30 minutes while the oven heats to its maximom with a lidded casserole dish inside.
Drop the dough into the hot dish, lid on, 30 minutes covered, then 15 minutes uncovered until it is deeply browned. Let it cool before cutting — cutting hot bread makes the inside gummy, and the wait is genuinely part of the recipe.
Why the lid matters: it traps steam, and steam is what lets the loaf keep rising before the crust sets. It is how a home oven imitates a bakery one. Without it you get a smaller, paler loaf.
The kid job — and here it is the entire recipe: the mixing. Four things in a bowl, stirred with a spoon until combined. There is no technique to get wrong, which means this is the one thing on this page a child can genuinely make from start to finish. The pot comes out of the oven at full heat, so that part is yours, not theirs.
Send them back to look at the bowl in the morning. Twelve hours turns a shaggy lump into something domed and full of bubbles, and watching that happen explains yeast better than you ever will.
Mezcla las cuatro cosas con una cuchara hasta integrar. Tapa el bol. Déjalo en la encimera de 12 a 18 horas. Ese es todo el método — el tiempo reemplaza el amasado por completo.
Vuélcalo sobre una superficie enharinada, dobla los bordes hacia el centro para formar una bola rústica y déjalo reposar 30 minutos mientras el horno calienta al máximo con una olla con tapa dentro.
Echa la masa en la olla caliente, tapa, 30 minutos tapado y luego 15 minutos destapado hasta que esté bien dorado. Déjalo enfriar antes de cortar — cortar el pan caliente deja la miga gomosa, y esperar es parte de la receta.
Por qué importa la tapa: atrapa el vapor, y el vapor permite que el pan siga creciendo antes de que la corteza se forme. Así un horno de casa imita al de una panadería. Sin tapa el pan sale más pequeño y más pálido.
La tarea del niño — y aquí es la receta entera: mezclar. Cuatro cosas en un bol, revueltas con una cuchara hasta integrar. No hay técnica que se pueda hacer mal, así que esto es lo único de esta página que un niño puede hacer de verdad de principio a fin. La olla sale del horno ardiendo, así que esa parte es tuya, no suya.
Mándala a mirar el bol por la mañana. Doce horas convierten un montón grumoso en algo abombado y lleno de burbujas, y ver eso explica la levadura mejor de lo que tú vas a poder.
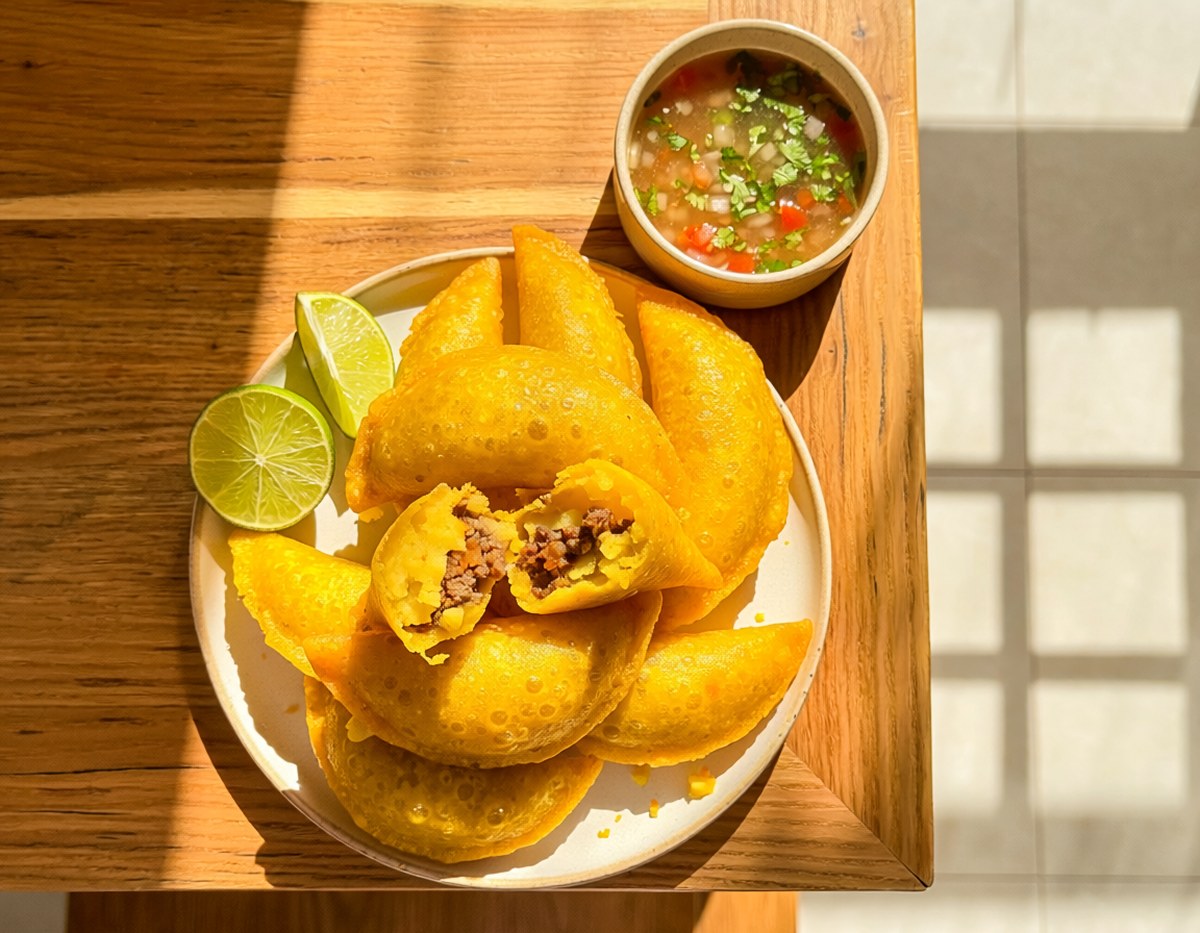
The dough
The filling
Ají
La masa
El relleno
Ají
Get the right flour or nothing else matters. You need masarepa — pre-cooked corn flour, the kind sold for arepas (P.A.N., Areparina). It is not the same as Mexican masa harina, and it is not cornmeal or cornflour. Masa harina will not hold together the same way, and the empanada will fall apart in the oil.
Cook the chopped onion, green onion and tomato in oil until they collapse into a soft, jammy sauce — ten minutes or so. That is hogao, and it is the backbone of the flavor. Add the garlic and cumin, then the meat, and cook it through.
Boil and roughly mash the potatoes and fold them into the meat. Season it more assertively than feels right — it is going inside a plain corn shell.
Then let the filling go completely cold. This is not patience for its own sake: hot filling makes steam, and steam bursts the seam open in the fryer.
Mix the masarepa, salt, achiote and oil, then add the warm water and work it for a couple of minutes until it is smooth and soft, like play dough. Rest it ten minutes.
The test: press a ball flat and look at the edge. If it cracks, the dough is too dry — wet your hands and work more water in. Cracked edges are the single reason home empanadas split open and leak.
Cut open a freezer bag to make two plastic sheets. Put a ball of dough between them, press flat with something heavy, spoon filling onto one half, then lift the plastic to fold it over — do not try to fold the dough with your fingers, it will tear. Press the edge to seal, then cut a clean half-moon with the rim of a bowl or a cup.
Oil at about 175°C / 350°F — a scrap of dough should sizzle steadily, not violently. Fry a few at a time, three or four minutes, until deep golden and blistered. Too crowded a pan drops the temperature and gives you greasy empanadas.
Colombian ají is not a cooked hot sauce, and it is not the smooth green stuff sold in jars. It is a fresh, loose, chopped relish — cilantro, onion and tomato in lime juice — made in five minutes and eaten the same day. Chop everything very fine, stir it together with the lime juice, water and salt, and leave it twenty minutes for the flavors to meet.
It should be spoonable and slightly watery, flecked red and green from the tomato and cilantro. That is correct, not a mistake. Heat is optional — plenty of families make it mild and let whoever wants it add their own. It cuts the fried dough, which is exactly the job it is there to do. Make more than you think.
The kid job: cutting the half-moons with a cup rim, and squeezing the limes for the ají. The cutting is genuinely satisfying and the shape comes out better when someone is concentrating on only that.
Consigue la harina correcta o nada más importa. Necesitas masarepa — harina de maíz precocida, la de las arepas (P.A.N., Areparina). No es lo mismo que la masa harina mexicana, ni harina de maíz común. Con masa harina no liga igual y la empanada se deshace en el aceite.
Cocina la cebolla, la cebolla larga y el tomate picados en aceite hasta que se deshagan en una salsa suave, unos diez minutos. Eso es el hogao, y es la base del sabor. Agrega el ajo y el comino, luego la carne, y cocínala bien.
Cocina y machaca las papas sin refinar demasiado, e incorpóralas a la carne. Sazona con más decisión de la que parece necesaria — va dentro de una cubierta de maíz sin sal.
Y deja que el relleno se enfríe por completo. No es paciencia por gusto: el relleno caliente genera vapor, y el vapor revienta el sello en el aceite.
Mezcla la masarepa, la sal, el achiote y el aceite; agrega el agua tibia y trábajala un par de minutos hasta que quede lisa y blanda, como plastilina. Déjala reposar diez minutos.
La prueba: aplasta una bolita y mira el borde. Si se agrieta, la masa está seca — mójate las manos y trábajale más agua. Los bordes agrietados son la única razón por la que las empanadas caseras se abren y se salen.
Abre una bolsa de congelador para tener dos láminas de plástico. Pon una bolita entre ellas, aplástala con algo pesado, pon el relleno en una mitad y levanta el plástico para doblarla — no intentes doblar la masa con los dedos, se rompe. Presiona el borde y corta una media luna limpia con el borde de un bol o una taza.
Aceite a unos 175 °C — un pedacito de masa debe chisporrotear parejo, no con violencia. Fríe pocas a la vez, tres o cuatro minutos, hasta que estén bien doradas y ampolladas. Una sartén llena baja la temperatura y te da empanadas grasosas.
El ají colombiano no es una salsa picante cocida, ni la cosa verde y lisa que venden en frasco. Es un picadillo fresco y suelto — cilantro, cebolla y tomate en jugo de limón — que se hace en cinco minutos y se come el mismo día. Pica todo muy fino, mezcla con el jugo de limón, el agua y la sal, y déjalo veinte minutos para que se junten los sabores.
Debe quedar aguado y de cuchara, con motas rojas y verdes del tomate y el cilantro. Eso está bien, no es un error. El picante es opcional — muchas familias lo hacen suave y quien quiera se lo agrega. Corta la fritura, que es exactamente para lo que está. Haz más del que crees.
La tarea del niño: cortar las medias lunas con el borde de una taza y exprimir los limones del ají. Cortar es muy satisfactorio y la forma sale mejor cuando alguien se concentra solo en eso.